Showing posts with label Breakfast. Show all posts

Tuesday, July 2, 2013

Buttermilk Pancakes


It feels like summer!  And not only because the temperatures in Chelan have been in the triple digits.  Last Sunday I took a much needed mental health day and didn’t do anything bar-related.  I kept all Barbri books shoved under the coffee table and didn’t even turn on my computer (except at the end of the day to watch Newsroom).  In case that wasn’t enough, I also convinced mom and dad to take a boat trip up-lake so I was even outside of cell service for most of the day.  Lake Chelan is 55 miles long and in my 22 summers here I had never been to the other end.  This seemed like an opportune time to take care of that oversight, so we quickly stocked the boat with sandwiches, chocolate, and wine (aka the essentials), and set out on our journey. 

I spent most of the ride up taking pictures of beautiful waterfalls and snow-topped peaks.  The landscape changes drastically as the lake meanders into the mountains so there was quite a lot to capture.  Once we reached Stehekin, the town at the remote end of the lake, we walked two miles to reach a quaint bakery in the woods.  Along the way we encountered charming cabins, a miniature Spanish Galleon ship, and an enthusiastic farmer named Carl.  We hit some choppy conditions on the boat ride home which gave me a chance to watch the waves while contemplating the important things in life. All in all, very restorative.   I've included a photo essay of the adventure:
This is where we stopped for lunch
  
We've arrived!
The Lady of the Lake makes the trip to Stehekin each day

End of the lake
Walking to the bakery

Lovely Garden/Farm with delicious herb goat cheese

Here are some adorable cabins:


It also feels like summer because I made pancakes.  I’ve cooked quite a few meals in this kitchen over the years, but pancakes are quite definitely my signature Chelan/summer dish.  When all of the cousins visit, I spend mornings over the griddle while people place their orders; I take requests for chocolate chip, blueberry, raspberry, or any combination thereof.  The cooking cycle of pancakes ensures I have a constant stream of company in the kitchen. 

I have been honing my recipe for the perfect buttermilk pancakes for some time now, and this is the latest iteration in that quest.  Please stay tuned for future discoveries and adjustments.  You know I never tire of posting about pancakes.


BUTTERMILK PANCAKES (SUMMER 2013)
makes 4 servings
Click here to print

9 oz. (2 cups) unbleached all-purpose flour
1/4 cup granulated sugar
2-1/2 tsp. baking powder
1/2 tsp. baking soda
1/2 tsp. kosher salt
3 Tbs. unsalted butter, melted; more for serving
2 cups buttermilk
2 large eggs
Vegetable oil for the griddle
Pure maple syrup for serving

Mix together dry ingredients.  Add melted butter, buttermilk, and eggs, and stir with a large spoon until everything is just combined.  Do NOT over-mix or you will end up with dense little discs.  The batter should be lumpy. 

Heat a large skillet over medium heat (preferably cast iron) and cook the pancakes over a light coating of vegetable oil.  Then smother with butter and syrup and enjoy!

Happy 4th of July!!

Tuesday, June 25, 2013

Pear & Almond Oatmeal


Hello friends. Long time.  Here is my quick update: law school is over; I no longer live in Boston; and I am currently in Chelan studying for the bar exam. 

Life in Chelan is simple.  I have found a rhythm to my studying that is almost (almost) enjoyable.   I dreaded bar-studying for so long that I had pretty low expectations for my level of happiness over these eight weeks.  All said, things certainly could be worse.   Maybe I will even look back on this time fondly; remembering my morning walks with mom, weekends golfing with dad, and evenings filled with wine and episodes of Newsroom (SO good).


 Another lovely silver lining that accompanies life in Chelan is that delicious and healthful meals magically appear before me while I study.  Mom loves oatmeal so we eat it most mornings.  In addition to being healthy brain food it is also an incredibly versatile meal that we rarely tire of.  Our basic canvas always consists of steel-cut thick oats cooked in milk (not water!) with a generous heap of cinnamon.  I guarantee it will make your kitchen smell like holiday baking and happiness.

Our options for add-ins shift depending on season and location.  In Chelan, we take advantage of summer berries and usually pair them with toasted walnuts or pecans.  In Maui we use mangoes- I know, I was skeptical at first too, but it creates a decadent consistency that is reminiscent of a peach crisp with streusel topping.  In the winter, when access to fresh and local fruit is more limited, we use things like apples and pears.  I came up with this particular combination a few months ago when I was still in Boston, drawing inspiration from the French classic: tarte amandine aux poires.  I think it is a delicious way to get the flavors of an almond tart sans calories.

My recipe makes four servings but you mathematic masters can easily cut it in half or quarters to adjust.  When I am in real life (read: when mom is not cooking all of my meals), I usually make a big batch of oatmeal at the beginning of the week and keep it in the fridge.  The primary benefits of this practice are: (1) you save time on subsequent mornings; and (2) your life is infinitely more pleasant because you only have to scrub the oatmeal off of your pot once a week.  This is a nice compromise for those of you who might be tempted to make the instant stuff. 

I am hoping that this post will jumpstart my summer blogging.  I’m sure things will get crazier as the bar approaches (7/30 and 7/31 for those of you keeping score), but this will provide my life with some balance and I have a backlog of recipes that I have been wanting to share!


PEAR & ALMOND OATMEAL

makes 4 servings

Click here to print

4 cups nonfat milk
2 cups thick steel-cut oats
2 teaspoons cinnamon
½ teaspoon almond extract
½ cup sliced almonds, toasted
1 pear, chopped

Combine milk, oats, cinnamon, and almond extract in a large pot over medium heat.  Bring to a simmer and reduce heat to keep milk from boiling over.  Cook for 15-20 minutes, stirring often, until oatmeal is tender.  Remove from heat and stir in pear and almonds.  Serve with an extra sprinkle of cinnamon.

Tuesday, April 30, 2013

Buckwheat Blini with Smoked Salmon


I ate incredibly well during my semester abroad in Paris.  So well, in fact, that I am amazed my jeans still fit by the end (I may or may not have eaten pain au chocolat on a daily basis).  I think my waistline was saved by two very important things: all of the walking I did while exploring my adopted city, and my French host mom’s cooking. 

Her meals struck the perfect balance between indulgence and moderation that only the French seem to manage with such ease.  Each meal commenced with a pureed vegetable soup to awaken our taste buds, then progressed to a delicious entree, and always concluded with a few morsels of pungent cheese and a small bowl of yogurt.  These three distinct courses set a relaxed pace for eating while simultaneously allowing for lengthy conversations (that I tried my very best to follow).  Each night I left the table feeling incredibly content but never uncomfortably full. 

But sometimes even the French can’t muster this level of sophistication.  One evening my host parents went to a party, leaving my fourteen-year-old host brother and me to fend for ourselves.  Based on my American conception of dinner sans parents, I expected we would probably dine on something in the genre of boxed macaroni and cheese and bagel bites.  But instead of taking a pre-packaged meal from the freezer, my host brother extracted four frozen blini and popped them in the toaster.  He then set the table with crème fraîche (a French pantry staple), smoked salmon, and a bag of minced chives.  The blini emerged from the toaster perfectly crispy, and we sat down to feast. 

The dinner changed my life not only because it introduced me to smoked salmon, but also because it completely shifted my understanding of the exciting and elegant possibilities for a quick meal.  This recipe that I am sharing took a bit longer to come together since I made the blini from scratch today, but now I have eight leftover blini in my freezer ready for future use! 

BUCKWHEAT BLINI WITH SMOKED SALMON

click here to print

1 teaspoon dried yeast
¾ cup plain (all purpose) flour
¾ cup buckwheat flour
1 egg, separated
4 tablespoons unsalted butter, melted
½ teaspoon white sugar
1 teaspoon salt
¾ cup lukewarm buttermilk

1 4-ounce package of thinly sliced smoked salmon
1 cup crème fraîche
½ cup minced chives

Combine yeast and ¾ cup warm water in a large bowl and stir to dissolve, then stand in a warm place for 10 minutes or until foamy. Slowly whisk in plain flour, then cover with a clean tea towel and stand in a warm place for 1 hour or until doubled in size.

Meanwhile, in a separate bowl combine buckwheat flour, egg yolk, 1½ tablespoons melted butter, sugar, milk and sea salt and whisk to combine, then gently fold into yeast mixture. Cover and stand in a warm place for 1 hour or until risen by half.

Whisk egg white until soft peaks form and fold through batter. Heat a heavy-based frying pan over medium heat, brush with remaining butter and cook batter, in batches, for 1-2 minutes or until bubbles appear, then turn and cook for another minute or until cooked through. Keep warm.

Top with smoked salmon, a dollop of crème fraîche and chives.


Monday, April 22, 2013

Blueberry Streusel Cake


I made this cake last Monday for a potluck brunch that my friend Laura hosted in honor of the Boston Marathon.  Her apartment is ideally located at the top of the challenging (and daunting) heartbreak hill, so we gathered there to lend our vocal support/enthusiasm to the runners.  Everyone contributed a ridiculous amount of delicious food (see crowded table pic below) and Laura made amazing bellinis with freshly squeezed peaches.  We feasted and chatted and then we spent hours cheering on runners, including our friend Kim- a first time marathoner!  It was the perfect morning with wonderful friends.


Given the fear and pain generated by the bombings, I feel very lucky to have those positive memories from the day.  I’ve really loved watching the marathon these past three years that I have been in Boston for law school.  For me it has always been about celebrating with friends and cheering for runners until my throat hurts and I lose my voice.  Since I’m moving to Seattle soon, I probably won’t be able to make it to next year’s marathon.  But when Patriot’s day rolls around again I can guarantee that I will be cheering extra loudly from across the country.

If you would like to make a contribution to victims of the bombing, please consider donating to the medical expenses for the two Boston College students who were seriously injured in the blasts.  Here are the links to the pages supporting Brittany and Liza.


BLUEBERRY STREUSEL CAKE
serves 6-8
Click here to print
from Gourmet Magazine

For streusel topping:
1 cup all-purpose flour
1 tablespoon plus 1 teaspoon packed dark brown sugar
1 tablespoon plus 1 teaspoon granulated sugar
3/4 teaspoon cinnamon
1/2 stick cold unsalted butter, cut into 1/2-inch pieces

For cake:
1 cup all-purpose flour
1 teaspoon baking powder
1/4 teaspoon baking soda
1/2 teaspoon salt
1/2 cup sour cream
3/4 teaspoon pure vanilla extract
1/2 stick unsalted butter, softened
3/4 cup granulated sugar
1 large egg
1/2 lb blueberries (3 1/4 cups)

Preheat oven to 350°F with rack in middle. Line bottom and sides of a 9-inch square baking pan with heavy-duty foil, leaving an overhang on 2 sides. Butter bottom and sides of pan, then dust with flour, knocking out excess.

Make streusel topping:
Stir together flour, sugars, cinnamon, and a pinch of salt in a large bowl. Blend in butter with your fingertips or a pastry blender until mixture forms large clumps.

Make cake:
Whisk together flour, baking powder, baking soda, and salt in a bowl.
Stir together sour cream and vanilla in a small bowl.

Beat together butter and sugar in a large bowl with an electric mixer at medium-high speed until pale and fluffy, about 5 minutes. Add egg and beat until well blended.

At low speed, mix in flour mixture in 3 batches, alternating with sour-cream mixture and mixing until just combined.  Gently fold in blueberries.  Spoon batter into pan, smoothing top (preferably with an offset spatula). Crumble half of topping evenly over batter.

Bake 25 minutes, then remove from oven and crumble remaining topping evenly over cake. Bake until a wooden pick inserted into center comes out clean, about 25 minutes more. Cool in pan 40 minutes. Lift out cake using foil and cool completely on rack.

Note:
Cake can be made 1 day ahead and kept, well wrapped in plastic wrap, at room temperature.


Wednesday, April 3, 2013

Shakshuka [Sarah's Guest Post!]


I was irrationally excited when Emily invited me to write this guest post for her blog. I love Em’s blog, and I am so excited to share this recipe for shakshuka! It is easily my #1 go-to dinner, and there are so many reasons why you should try it. Most importantly it is DELICIOUS. Beyond that, it is healthy, easy to make (only 30ish minutes!), vegetarian if that’s your thing, and it minimizes clean-up time because you can wash most of the dishes while it’s simmering.

I originally got this recipe from food blog titan Smitten Kitchen, which describes shakshuka as an Israeli dish of poached eggs in spicy tomato sauce. Others think the origins of shakshuka are Lebanese. Wherever it comes from, all experts agree that you should make it immediately. Thanks again Emily for asking me to post!


Here are a few things to keep in mind before making shakshuka:
  • Shakshuka is saucy, so serve it in a bowl rather than a plate.
  • The Smitten Kitchen recipe suggests serving it with pitas, but since the pitas you can buy at the grocery store are not puffy, I’ve always served it with crusty bread instead. I think you need the fluff for dipping and mopping up the spicy sauce. If you are ambitious you could bake your own bread (ahem, Emily), or you could just pick up your favorite crusty, fluffy bread at the store. If you want, warm it in the oven while the shakshuka is cooking.
  • Sometimes your shakshuka will be spicy and sometimes it won’t be. There’s just no way to tell if a jalapeno is spicy by looking at it, as far as I know.
  • If you are planning to save some for leftovers (which I HIGHLY recommend - best lunch ever), make sure you don’t overcook the eggs, unless you’re weirded out by runny eggs. If they are more cooked the first time, when you heat it up the second day the eggs can sometimes get a little bit overcooked. You could also avoid putting in all 6 eggs initially and just poach them in already-cooked sauce the following day, but that sort of defeats the purpose of being able to have a quick, portable lunch (of paramount importance to those of us in law school, and really, everyone).

SHAKSHUKA
Click here to print
serves 4-6 (in my experience, serves 2 for both a hearty dinner and a light lunch the next day)

¼ cup olive oil
3 jalapenos, seeded and finely chopped (leave some seeds in for more spicy potential)
1 small yellow onion, chopped
5 cloves garlic, crushed and sliced
1 tablespoon paprika
1 teaspoon cumin
1 28-oz can whole tomatoes, do NOT drain (I usually use Muir Glen organic)
6 large eggs
Kosher salt to taste
½ cup feta, crumbled (I just dump in however much I feel like)
1-2 tablespoons chopped parsley (flat leaf or curley is fine)*

*About the parsley - I actually think it adds a lot of freshness to this dish, whereas in others it’s just a garnish and doesn’t make much of a difference. I’ve forgotten it plenty of times and it’s always better when I include it.

Chop the onion and stem, seed and finely chop the jalapenos. Heat oil in a large pot or 12-inch skillet over medium-high heat. Add the jalapenos and the onion and stir until the onion starts to brown, about 6 minutes. While the onion and jalapenos cook, prepare the garlic and tomatoes as follows.

Crush and slice the garlic. Open the canned tomatoes and pour them into a bowl. Then add ½ cup water to the bowl and crush the tomatoes with your hands.  Be careful! This can easily stain your clothes. I recommend putting the bowl in the sink so any juices that spurt just end up in the sink. Put the tomatoes aside.

Once the onion has started to brown, add the garlic, paprika and cumin. Stir it around a lot and smell it, because it smells amazing. Cook and stir for about 2 minutes, until the garlic is soft.

Add the tomatoes with their juice and the ½ cup water. Stir and lower heat to medium. Simmer, stirring occasionally, for about 15 minutes. (This is a great time to clean some dishes, make a salad, set the table, etc). Chop up some parsley, and get out your eggs. Season the sauce with salt to taste.

Crack eggs over the surface of the sauce so they are evenly distributed (usually a circle of 5 with 1 egg in the middle). Cover the skillet and cook about 5-6 minutes, until the yolks of the eggs are set. If you don’t have a tight fitting lid, use aluminum foil - it may take longer for the eggs to cook because some air is escaping. Use a spoon to swirl the whites around with the sauce, without disrupting the yolks. Sprinkle parsley and feta into the shakshuka. Serve in bowls with crusty bread or fluffy pitas!

Saturday, March 24, 2012

Cinnamon-Swirl Bread


            I generally think of myself as more of a savory person- I would rather forgo dessert to make room for more of the main course.  And if I had to pick a last meal on earth I think I would focus on cheese and carbs instead of chocolate.  But when I go to brunch, I suddenly find myself craving sweet things.  So I am ultimately faced with a paralyzing decision: sweet or savory?!! 
I have a weakness for pancakes, but somehow brunch seems incomplete without protein from eggs and bacon.  Unfortunately, most restaurants force me to either make this agonizing decision, or order two entrees…some have breakfasts that combine sweet and savory, but those meals are usually labeled embarrassing things like “Hearty Lumberjack Fat Pants Breakfast.”  My usual approach is to order eggs and then get pancakes for the table to “share” with my boyfriend.   
When I open my restaurant (in the 20 year plan), I won’t force people to choose.  Everyone will get a basket of Cinnamon-Swirl Bread to start- so they can have sweet to start no matter what they have as their entrée!  This recipe was actually on the docket for Frozen February, but I never had time to post it.  I thought it was perfect because the recipe makes two loaves- so you can eat one fresh and freeze the other.  The original from Fine Cooking calls for raisins, but I am not a fan of raisins in baked goods, so I left them out.  The recipe also suggested making homemade butter- so I did!  It was incredibly easy and amazing. 

CINNAMON-SWIRL BREAD
makes 2 loaves

18 oz. (4 cups) unbleached all-purpose flour; more for dusting
6 Tbs. granulated sugar
6 Tbs. ground cinnamon
1 packet (1/4 oz. or 2-1/4 tsp.) instant yeast
2 tsp. fine sea salt
1/2 cup whole milk
1 large egg
3-1/2 oz. (7 Tbs.) unsalted butter, softened; more for the pans

Make the dough:
Lightly oil a large bowl. In a stand mixer fitted with the dough hook, combine the flour, 2 Tbs. each of the sugar and cinnamon, the yeast, and salt. Combine on low speed, about 1 minute. Add the milk, egg, 3 Tbs. of the butter, and 3/4 cup room temperature water; mix on medium speed, scraping the bowl as necessary, until the dough comes together, about 1 minute. Increase the speed to medium high and continue to mix until the dough is smooth, slightly sticky, and clinging to the hook, about 5 minutes. Scrape down the dough hook with your hand, and remove the bowl.
Turn the dough out onto a well-floured surface, roll it into a ball, and put it in the oiled bowl. Cover loosely with plastic wrap and let sit at room temperature until the dough looks slightly puffy, about 30 minutes.
On a well-floured surface, use your hands to flatten and spread the dough out until it’s about 3/4 inch thick. Fold the dough in half from top to bottom, then in half again from left to right. Return the dough to the bowl, cover, and let sit until it has risen slightly, about 30 minutes more.

Shape and bake:
Generously grease two 8-1/2x4-1/2-inch loaf pans with butter. In a small bowl, combine the remaining 4 Tbs. each cinnamon and sugar; set aside. In a small saucepan over low heat (or in a bowl in the microwave), melt 2 Tbs. of the butter; set aside.
On a lightly floured surface, divide the dough in half and use a rolling pin to shape each half into an 8-1/2x16-inch rectangle that's 1/4 inch thick. Use a pastry brush to spread the melted butter on the dough. Sprinkle the cinnamon-sugar mixture evenly over both rectangles.
Starting from the short side, gently roll each rectangle into an 8-1/2-inch-long cylinder. Put the cylinders in the pans, seam side down. Cover loosely with plastic wrap. Let rest at room temperature until the dough has risen slightly and springs back when pressed lightly, at least 2 hours. **I let mine rise overnight so that I could bake it for breakfast.
Position a rack in the center of the oven and heat the oven to 375°F. Bake the loaves, rotating and swapping the positions of the pans halfway through baking, until dark brown and hollow-sounding when thumped on top and an instant-read thermometer inserted in the center of the loaves registers about 190°F, 30 to 35 minutes. Transfer the loaves in their pans to a rack.
In a small saucepan over low heat (or in a bowl in the microwave), melt the remaining 2 Tbs. butter. Brush the top of each loaf with the butter.
When cool enough to handle, remove the loaves from the pans.  Serve with generous pats of fresh butter.
If you want to freeze one loaf, I recommend slicing it first so that you don’t have to defrost the whole thing to eat it.


HOMEMADE BUTTER

2 cups heavy cream
1/4 tsp. Kosher salt or sea salt

In a stand mixer fitted with the whisk attachment, whip 2 cups of heavy cream on medium speed until medium peaks form, about 3 minutes. Put a splatter guard on the bowl or drape a kitchen towel over the mixer and the bowl. Increase the speed to high and continue whipping until the solids separate from the buttermilk (you will hear sloshing), about 8 minutes.
Gather the butter into a ball and put it in a strainer. Rinse under cold water, squeezing with your hands, until the water runs clear, about 1 minute. Knead in 1/4 tsp. sea or kosher salt and shape the butter as you like. Pat it dry with a paper towel, wrap in plastic, and refrigerate for up to a month.

Wednesday, February 15, 2012

Daring Cooks: Polenta Cakes with Poached Eggs & Roasted Asparagus


Ok, I know that I promised all of my February posts would be freezable, but it’s the 15th so I have to put up my Daring Cook’s post!  Sadly it does not fall into the category of things that freeze well…but I promise to get back to freezer foods shortly! 

The challenge for this month was frying patties with a very wide scope- I could basically combine any ingredients in a flattened disk, coat it in something, and then either bake or fry.  Of course I went with the frying option.  I decided to make polenta cakes to soak up runny poached eggs.  It was so easy and they browned perfectly! 

If you are not an egg fan, these would also be delicious at dinner paired with almost any kind of meat.  If you have never poached an egg- don’t be scared!  Watch one of these helpful videos and you will be a pro. 


POLENTA CAKES WITH POACHED EGGS & ROASTED ASPARAGUS
serves 6
Click here to print

1 box quick cooking polenta
½ cup Parmesan
Sea salt
1 tablespoon butter
½ cup flour
1 egg (for the egg wash)
1 cup panko breadcrumbs
Canola oil
6 eggs (for poaching)
Roasted asparagus (or another yummy vegetable)

Make the polenta according to box instructions, then mix in the parmesan and sea salt to taste.  Pour into a buttered 8x8 pan and let cool.  Once the polenta has cooled completely, cover and refrigerate overnight. 

When you are ready to make the cakes, cut the polenta into round discs.  I used an inverted wine glass and it worked perfectly.  A biscuit cutter would be ideal.  Set up the frying station: put the flour and breadcrumbs each on their own plate, then put the egg in a bowl and beat it with a little bit of water.  Dredge each patty in flour, then dip it in the egg, and finally coat it in panko.  Continue with the remaining polenta.

Next, heat about 2 tablespoons of canola oil in a large, flat bottomed pan over high heat.  The bottom of the pan should be completely covered in oil, so adjust accordingly.  To test whether the oil is ready for frying, throw in a tiny droplet of water.  If it sizzles, you’re good to go.  Using tongs, add the polenta cakes to the oil.  Depending on how big your pan is, you may want to do this in two batches.  If they get too crowded they won’t cook evenly. 

Cook them for about 3 minutes on each side, or until nicely browned, then remove to a cooling rack.  You can put the cooling rack on a baking sheet and transfer the cakes to a 250 degree oven until you are ready to eat.   Top with a poached egg and your roasted vegetable of choice. 


Friday, December 30, 2011

Christmas Morning Cinnamon Rolls


I realized this morning that I needed to hurry up and post these before resolutions and diets turn everyone against sugar.  For those of you who regularly read my blog, you may notice that these are not my typical fare.  It’s not that they are unhealthy- I post plenty of caloric recipes that will clog your arteries.  But usually when I eat something decadent, I like to make it completely from scratch to ensure that every component is as delicious as it can possibly be.  If I am going to have to do fifty lunges to work something off, it better be worth it! 

But every once in a while, a magical recipe comes along that has a lot of shortcut ingredients but is also COMPLETELY DELICIOUS.  My mom has been making these rolls for Christmas morning since before I can remember and they are amazing.  I actually have some serious self-control issues around them.  For example- I always volunteer to put the leftovers away so that I can cut off the really gooey middle pieces and have a few (10) perfect last bites.  Then I suffer through the inevitable tummy ache (it’s so worth it) and usually don’t eat again until Christmas dinner. 

Anyways, back to the shortcut ingredients- I was so surprised when I asked for the recipe last year and learned that they include packaged butterscotch pudding!  I can say with some certainty that you will probably never see me post another recipe with packaged pudding of any kind.  But these rolls are perfect for holidays or special occasions when you don’t want to spend hours making a mess in the kitchen and waiting for dough to rise.  You simply throw all of the ingredients in a bundt pan (without even mixing them together!) and then they rise overnight so they are magically ready to bake the next morning.  They would also be ideal for New Year’s brunch- throw everything together before going out for new year’s eve and all you have to do in the morning is pre-heat the oven.  Your hangover will thank you.


CHRISTMAS MORNING CINNAMON ROLLS 
serves 6 (or more if you have self control)
Click here to print

18 Rhodes frozen white dinner rolls
1 cup brown sugar
1 small pkg (not instant) butterscotch pudding
¼ cup white sugar
1 cube melted butter

Grease and flour bundt pan. Put rolls(still frozen) in bundt pan. Sprinkle ingredients over rolls then drizzle with the melted butter. No need to mix. Let sit overnight on counter. Preheat the oven to 350.  Cover a large baking sheet with foil (in case the rolls bubble over), place the bundt pan on the foil and bake for 20-30 minutes.  Invert onto a large platter, then scrape the bundt pan so that you don't waste any of the gooey deliciousness. 

Sunday, December 11, 2011

Onions with Oven Baked Eggs


I’m taking a quick break from finals to post this so I don’t have a lot of time to rave about how much I love the simplicity of eggs and onions.  There are few smells in the kitchen that are more appealing than onions cooking in butter.  If you want to have a successful dinner party, cook something with onions and your whole house will smell delicious.  If your eyes can’t handle the crying, might I suggest these fashionable accessories?  They make great Christmas gifts! 

You can add almost anything to this sauté and achieve delicious results (my favorites include bacon, mushrooms, spinach, red peppers, scallions, and bacon).  But this recipe illustrates how easy it is to whip up a delicious breakfast (or dinner!) with ingredients you are likely to have on hand.  This is especially handy if you are spending 12+ hours in the library each day and have no time to visit the grocery store at normal intervals. 

If you like your yolks runny then watch this like a hawk in the oven!  They cook deceptively fast on the inside while maintaining the guise of being glossy and uncooked.  While we are on the subject, if for some reason you don’t like runny yolks, we probably can’t be friends anymore.  I am working on a future post where I plan to exalt the luxurious perfection that is a runny egg yolk, but I don’t want to give too much away yet. 
Back to studying!  Enjoy!

ONIONS WITH OVEN BAKED EGGS 

serves 2
3 tablespoons butter, divided
2 cups yellow onions, sliced
4 eggs
Salt and pepper
Chives (optional)
Toast

Preheat the oven to 400 degrees.  Melt 2 tablespoons of butter in a large oven-proof skillet over high heat.  Add the onions and sprinkle with a bit of salt to get them to release their liquids.  Cook over high heat, stirring frequently, for about 5 minutes.  You want to brown the onions to give them flavor while avoiding burning them.  Once they are nicely browned, reduce heat to medium and sauté for another 10 minutes, or until they are cooked through and slightly sweet.  Season to taste with salt and pepper.

Clear four little spots in the pan for the eggs and put a small pat of butter in where each egg will go.  Deposit the eggs, sprinkle with salt and pepper, and put in the oven.  Cook for anywhere from 3 minutes to 10 minutes depending on how you like your eggs.  Check frequently to avoid over-cooking. 

Garnish with chives and serve with crusty bread or toast.  And sriracha. 


Friday, December 2, 2011

Wonderful Waffles


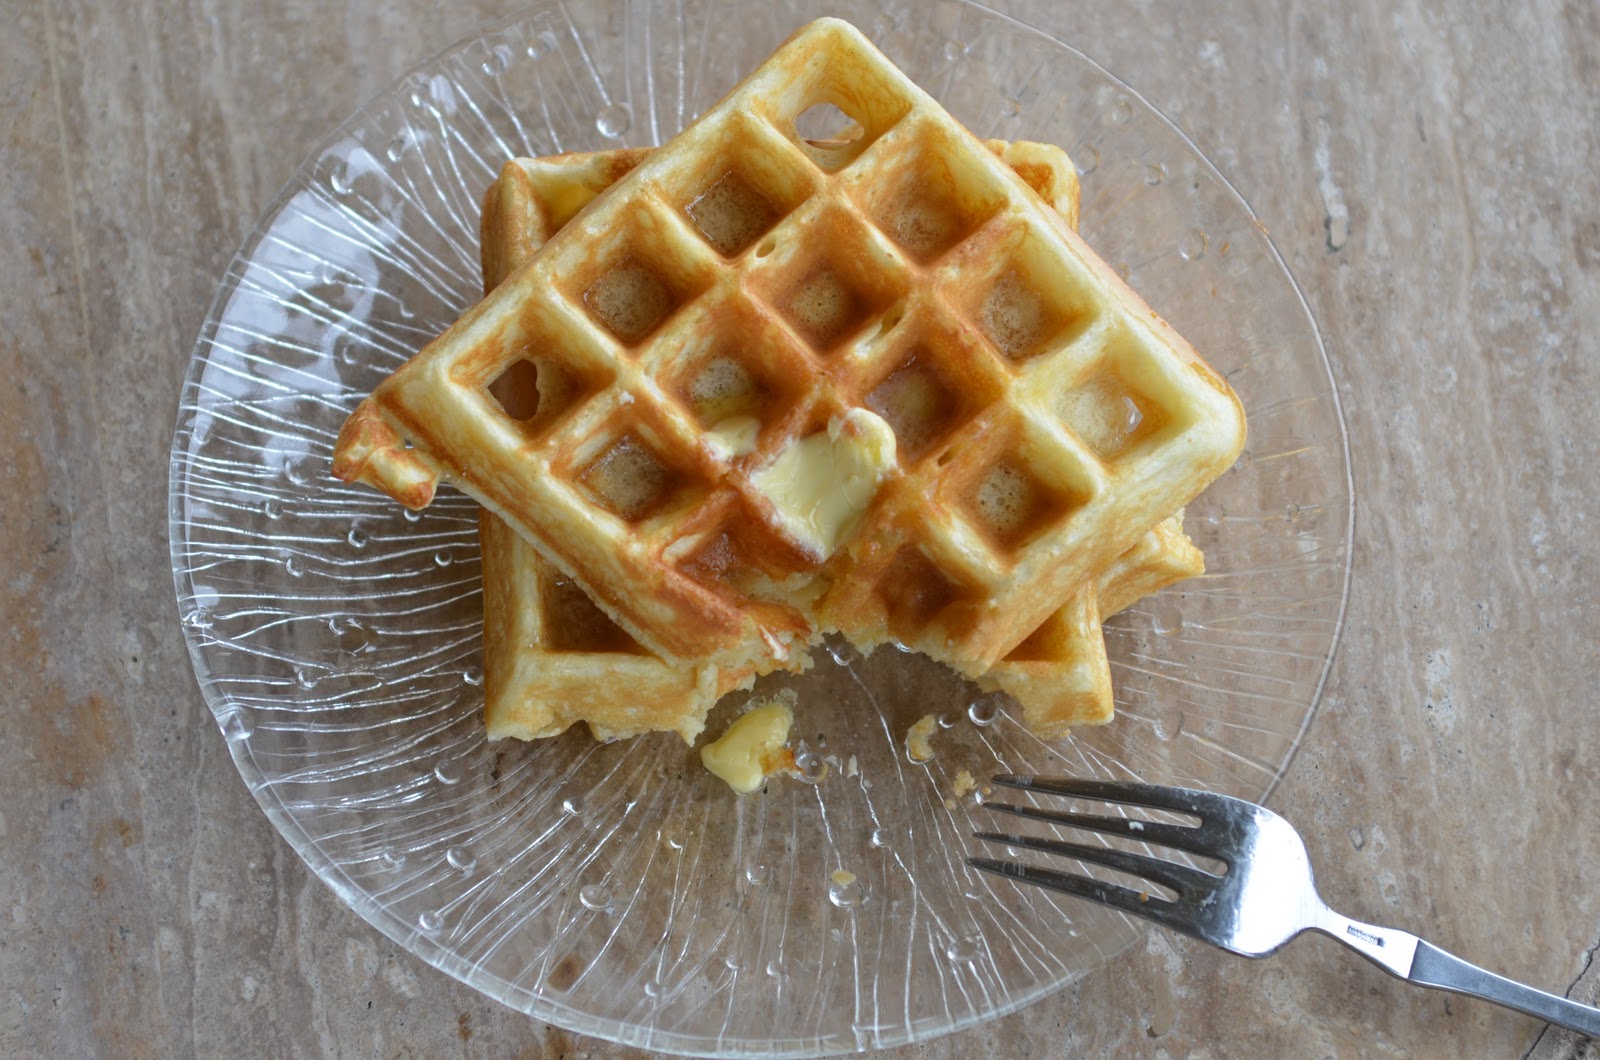
This recipe comes from one of the first cookbooks I ever used when I was little.  It is called the “Alpha-Bakery Children’s Cookbook” and  it offers a recipe for each letter of the alphabet along with a cute but sometimes weird cartoon version of the food (usually the cartoon food has a face).  Thankfully I have grown out of most of the recipes (such as “Quick Cheeseburger Pie”- which I really think is cheating because you can put “quick” in front of anything to satisfy the requirements for the letter Q).  But this is still my favorite waffle recipe.

You will notice I have many recipes for pancakes on my blog, and all of them are delicious in their own way.  But this is the ONLY waffle recipe I have posted because it is quite simply the best.  I have tried many other waffle recipes that do not reach this level of fluffy perfection.  I also like that they are not too sugary.  Waffles shouldn’t be sweet- that is what the syrup is for.  Part of reaching waffle excellence is getting the optimum amount of butter to melt in each little square.  My dad achieves this  by slicing little squares of butter onto his plate while the waffle is in the iron.  Then, he is ready to quickly distribute the butter on the hot waffle the second it is ready.  The recipe only makes about 4 waffles so if you are cooking for a crowd, double it! 


WONDERFUL WAFFLES
makes 4 waffles
1 cup flour
2 teaspoons of baking powder
1 teaspoon sugar
¼ teaspoon salt
1 cup milk
¼ cup butter, melted
1 egg, separated

Heat the waffle iron.  Mix flour, baking powder, sugar, and salt in a medium bowl.  Stir in milk, butter, and egg yolk until blended.  Beat egg white in a small bowl on high speed until stiff peaks form.  Fold the egg whites into the batter.  Pour about 2/3 cup of the batter into the center of the hot waffle iron and bake until steaming.  Repeat with remaining batter. 

Monday, November 14, 2011

Cauliflower with Brown Butter, Pears, Sage & Hazelnuts


Ok I know the combination of pears and cauliflower sounds a bit odd...but I promise this was delicious!!  Cauliflower is not a vegetable that I typically serve at Thanksgiving, but I was very intrigued by the ingredients in this recipe.  The pears added a perfect crisp texture and a slight sweetness that was delectable.  I heard a rumor that my aunt recently picked around all of the pears in a salad so I don’t think this dish will make my Thanksgiving menu, but it would pair perfectly with other Thanksgiving flavors!  

Speaking of Thanksgiving, I promised a few people that I would post a sample of my Thanksgiving itinerary so I’ve included it below.  Some may mock me for this display of compulsive organization, but it helps me visualize all of the steps to avoid complete chaos.  This is especially important for a dinner that includes so many dishes that need oven space.  The cauliflower would actually be a great addition since it can be done at the last minute on the stove and doesn’t require time in the oven.  In order to free up even more oven space this year I will be cooking my turkey on the grill!  I have very high hopes for the outcome.  

As you think about your turkey plans, I would like to make a case for the benefits of brining.  The salt in brine draws out the blood, cleansing the bird and seasoning the meat down to the bone.  Sugar adds depth of flavor and helps the turkey brown to perfection.  Most grocery stores carry brine mixtures and I usually use those.  Just dissolve the brine in boiling water, cool, and add a bottle of dry white wine.  Then submerge the bird in the liquid for 2-4 days.  Using a very large pot works well.  It also helps if you have two refrigerators since it takes up a bit of space.  Make sure you dry it thoroughly before roasting.


CAULIFLOWER WITH BROWN BUTTER, PEARS, SAGE & HAZELNUTS
Recipe from Fine Cooking
makes 8-10 servings
 
6 tablespoons unsalted butter
1 medium head cauliflower, cut into small florets about 3/4 inch wide
1/2 cup toasted, skinned, chopped hazelnuts
8 fresh sage leaves, thinly sliced crosswise
Kosher salt and freshly ground black pepper
2 large ripe pears, cored and thinly sliced
2 Tbs. chopped fresh chives (original recipe called for parsley but I think chives add more flavor)

In a 12-inch skillet over medium-high heat, melt the butter until light brown and bubbly. Add the cauliflower, hazelnuts, and sage. Cook for 2 minutes, stirring occasionally. Season with 1 tsp. salt and 1/2 tsp. pepper and continue cooking, stirring occasionally, until the cauliflower is browned and crisp-tender, 6 to 7 minutes more.
Remove the pan from the heat. Add the pear slices and chives. Gently toss to combine and warm the pears. Season to taste with more salt. Serve hot or at room temperature.


Thanksgiving Agenda 2009


11:00
Assemble Stuffing
Dress Turkey

Emily & Mom
12:30
Mash Potatoes
Prepare Butternut Squash, and pine nut mix

Emily & Mom
2:00
Turkey in Oven
325 Bottom
Emily
3:45
Cranberry Sauce

Emily
4:20
Both Stuffings in Oven (1 hour covered, 10 mins uncovered)
Make Biscuit Batter
350 Top
Emily

Erin, Lizzy, Aunt Suzi
4:30
Caramelize shallots, add green beans


Emily

4:40
Heat Potatoes
Drink a glass of wine at the bar and talk to chef

Emily
 Aunt Suzi & Mom
4:50
Turkey out of oven
Make Gravy
Roast butternut squash (35-35 mins)
425 Bottom

450 Bottom

Emily
Mom
5:10
Biscuits in Oven (14-16mins)

Sauté pine nuts and garlic for squash
425 Bottom
Erin, Lizzy, Aunt Suzi
Emily
5:20
Carve Turkeys
 Assemble and Dress Salad

Dad
Mom & Emily
5:30
Biscuits, Stuffing, Squash out of Oven
Add squash to garlic and pine nuts

Everybody
Emily